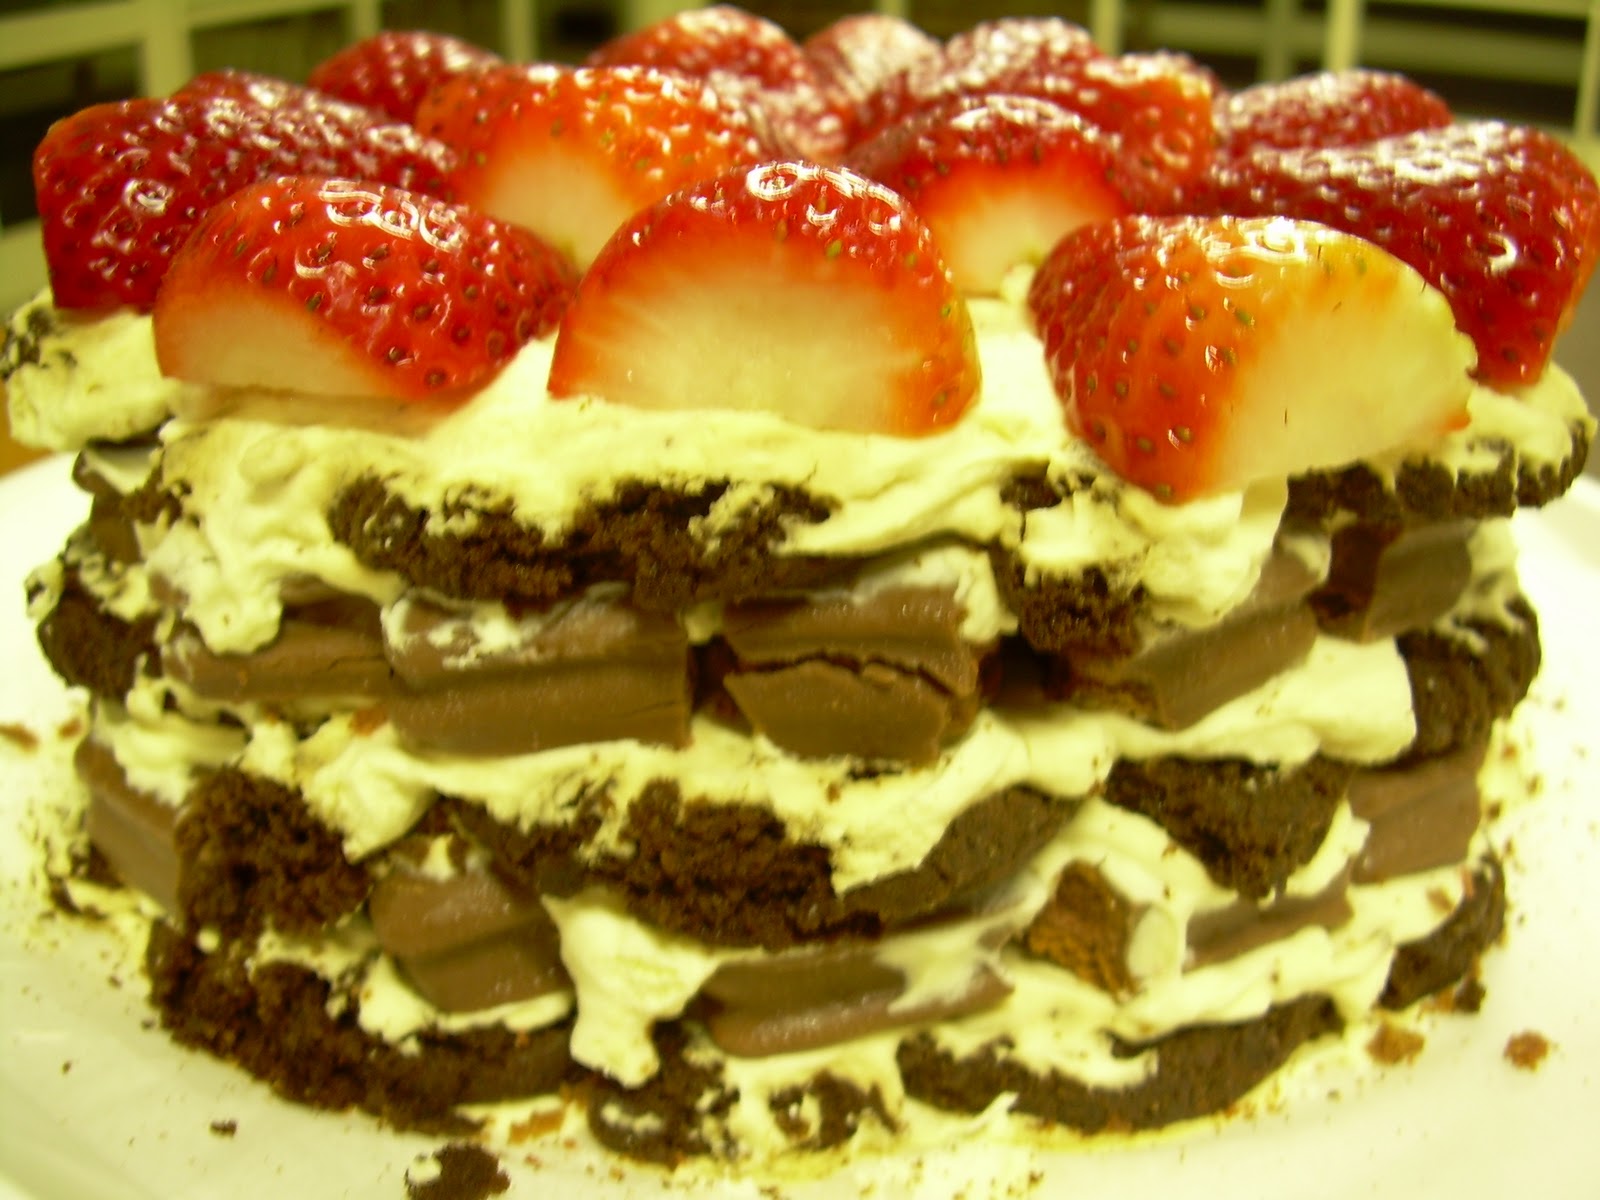
I created this awesome, rich, Tim Tam cake, Choc Ripple style, for Gunnar's birthday on the weekend. Here's how it goes:
300ml cream (add an extra 100ml if you want to cover the edges as well and completely incase the cake)
1 teaspoon vanilla essence
1 teaspoon icing suger/caster sugar
1 x 250g packet Choc Ripple biscuits
1 pkt Tim Tams, original or dark chocolate, + 1 Tim Tam more
Fresh strawberries, to serve.
Beat cream, sugar and vanilla essence together until firm peaks form.
Spread a little cream on some baking paper or cake plate as the base, making a circle shape. Place seven choc ripple biscuits on the base, close together. Crumble one Choc Ripple biscuit on the side and use crumbs to fill in the gaps between each biscuit.
Spread a thin layer of cream on top of the Choc Ripple biscuits.
Crumble your Tim Tams, the size is up to you. The larger the chunks, the more crunchy the cake will be (and harder to cut neatly). Fill in the gaps with smaller pieces.
Spread over another layer of cream, and repeat the Choc Ripple and Tim Tam layers again, with cream in between.
Finish with a layer of cream.
Refrigerate for 6 hours, or overnight.
Before serving, wash and hull strawberries (remove tops). Halve them and place on top in whatever pattern you like.
Enjoy!
If you don't have access to Choc Ripple biscuits, you can use any plain baked chocolate biscuits. The idea is that the Choc Ripple biscuits and the biscuit part of theTim Tams absorb moisture from the cream, making them soft like cake.
Welcome to my blog of 'mostly' original recipes. I love trying new things in the kitchen, so I thought I'd share some of my creations with you...
Monday, November 8, 2010
Saturday, October 2, 2010
Almond Butter
A friend of mine told me how to make almond butter - or almond spread - a while ago and I've been making it ever since. This batch used 3 kgs of almonds, roasted in a 180deg oven for 30min, then processed in a food processor with extra virgin olive oil and macrobiotic sea salt (has tonnes of original minerals from the sea in it). No sugar added!! Just add the oil slowly into the ground almonds whilst in the processor. After about a minute it will turn into a paste. Don't add too much oil too soon, as you can't take it out again! Store in the fridge... ours lasts only as long as takes us to consume it, and so far that has been a few months, which has been fine.
Tuesday, March 23, 2010
Falafels / Chickpea Patties
This one's not my own creation; I got it from the internet and altered it a bit according to what I had in the cupboard. I made these for a BBQ as I can't eat meat (sausages for example!) and the meat-eaters quite enjoyed these as well!
2 x 400g cans Chickpeas, drained
1 onion, chopped
fresh parsley, chopped (1/2 cup is ideal, but whatever you have is okay)
2 cloves garlic, chopped
1 egg
2 teaspoons ground cumin
1 tspn ground coriander
1 tspn salt
1/4 tspn lemon pepper (you could use lemon juice and ground black pepper instead)
1 tspn baking powder
1 tablespoon olive oil
1 cup dry breadcrumbs
oil for frying
Makes 8 large or 16 small patties
Mash chickpeas until thick and pasty - don't use a blender as it will make them too runny.
1 onion, chopped
fresh parsley, chopped (1/2 cup is ideal, but whatever you have is okay)
2 cloves garlic, chopped
1 egg
2 teaspoons ground cumin
1 tspn ground coriander
1 tspn salt
1/4 tspn lemon pepper (you could use lemon juice and ground black pepper instead)
1 tspn baking powder
1 tablespoon olive oil
1 cup dry breadcrumbs
oil for frying
Makes 8 large or 16 small patties
Mash chickpeas until thick and pasty - don't use a blender as it will make them too runny.
In a blender, blend together onion, parsley and garlic until smooth. Add a few drops of water to it if it's not blending well.
In a small bowl mix together egg, cumin, coriander, salt, lemon pepper and baking powder. Stir into chickpea mash together with the olive oil. Slowly add breadcrumbs until mixture is not too sticky but will hold together. Add more or less breadcrumbs as needed.
Form balls (according to desired size) and then flatten into patties. Heat 2cm of oil in a large frypan over medium-high heat. Fry patties until brown on both sides. Stack on a plate covered with absorbent paper.
Vegetarian Enchilades
Serves 6-8
Sauce
3 garlic cloves, crushed
1 tablespoon oil
1 tablespoon dried oregano (or 3 tablespoons fresh oregano, chopped)
2 tablespoons flour
170g tomato paste
3 cups water
1 teaspoon salt
1 tablespoon vinegar
Saute garlic in oil on low heat, about 3 minutes. Add oregano and cook 1 minute. Add flour and stir constantly until oil is absorbed. Gradually add tomato paste and water, stirring constantly. Cook on low-medium heat until thick. Set aside.
Preheat oven to 175 C.
Filling
1 onion, chopped
3 garlic cloves, crushed
1 tablespoon oil
2 to 3 teaspoons ground cumin
1 teaspoon ground coriander
1 tin '3 bean mix' or other beans as desired
1 to 2 cups of mixed vegetables of your choice, chopped small and lightly steamed or boiled (use whatever you have in the fridge or garden, but I used green zuchini, yellow zuchini, and green beans - tinned corn would be great in this)
8 or more tortillas
Saute onion and garlic until soft. Add cumin, coriander, beans and vegetables, and stir through. Cook on medium heat for about 5 minutes.
Assembly
Lightly grease a deep baking tray. Spoon about 1/2 cup of filling into each tortilla. Roll up and place in tray. Repeat for each tortilla. Pour some sauce over tortillas, about a cup or so. Bake for 15 to 20 minutes until bubbling.
Notes: You can heat the remaining sauce and serve with the enchiladas, or you can freeze it for next time (which is what I did because it was so much). You should have enough sauce over to do another tray of tortillas.
I found that I could only barely fill 9 tortillas, and I could only fit that many into my baking tray! The original recipe was for 12 tortillas!
Thursday, February 14, 2008
Cherry Coconut Hearts
I made these for my husband for Valentine's Day. He was pleasantly surprised!
I would add a bit more sugar next time as they didn't turn out very sweet, though still very tasty.
125g butter or margarine
1/2 cup sugar or more
1 egg
2 cups wholemeal spelt flour (substitute 1 cup SR and 1 cup plain wheat flour and omit baking powder if you like)
1 teaspoon baking powder
1/2 cup desiccated coconut
water
preserved cherries (available in a jar at Aldi stores)
Oven setting: 180 C
Baking time: 15 minutes
Cream butter and sugar together. Add egg and beat well. Add flour (with baking powder) and milk alternatively to form a firm dough. Add coconut and mix well. Add a little water if it's too dry.
Roll out mixture as thinly or thickly as you desire (I did 0.5cm); cut out shapes and place on a well-greased baking tray. Space the biscuits at least one cm apart from each other on the tray as they do 'grow' during baking.
Make slight indentations in the middle of each biscuit with your finger and place one cherry on each. You could put more on, but too many would hinder the baking process (it would make them too moist on top). Spread a little of the cherry juice around the biscuit with a teaspoon - not too much as it would make the dough too moist.
Bake for 15 minutes or until lightly browned. Loosen the biscuits from the tray while still hot (use a plastic egg flip). Leave them a few minutes then stack into your biscuit storage container.
I would add a bit more sugar next time as they didn't turn out very sweet, though still very tasty.
1/2 cup sugar or more
1 egg
2 cups wholemeal spelt flour (substitute 1 cup SR and 1 cup plain wheat flour and omit baking powder if you like)
1 teaspoon baking powder
1/2 cup desiccated coconut
water
preserved cherries (available in a jar at Aldi stores)
Oven setting: 180 C
Baking time: 15 minutes
Cream butter and sugar together. Add egg and beat well. Add flour (with baking powder) and milk alternatively to form a firm dough. Add coconut and mix well. Add a little water if it's too dry.
Roll out mixture as thinly or thickly as you desire (I did 0.5cm); cut out shapes and place on a well-greased baking tray. Space the biscuits at least one cm apart from each other on the tray as they do 'grow' during baking.
Make slight indentations in the middle of each biscuit with your finger and place one cherry on each. You could put more on, but too many would hinder the baking process (it would make them too moist on top). Spread a little of the cherry juice around the biscuit with a teaspoon - not too much as it would make the dough too moist.
Bake for 15 minutes or until lightly browned. Loosen the biscuits from the tray while still hot (use a plastic egg flip). Leave them a few minutes then stack into your biscuit storage container.
Subscribe to:
Posts (Atom)